Upptimeという GitHub Actionsを使ったサイト稼働状況監視ツールを使って このブログを監視してみることにしました。
Upptime
Upptimeは
一瞬単語のつづりに混乱しますが、
Uptimeではなくて、pが一個入ってUpptime。
ウェブサイトなどの稼働状況をチェックするためのツールです。
この upptime のレポジトリをテンプレートとして、自分でレポジトリを作り、 監視先を設定すると、その監視先の稼働状況やレスポンスタイムなどを定期的に チェックして記録してくれます。
また、それらをいい感じに可視化してくれます。
設定
に従っていけば簡単にできます。
- テンプレートから自分のレポジトリ作り、
- GitHub Pagesの設定をして
- Access Tokenを作成してGH_PATという名前でレポジトリに登録する
あとは好きに.upptimerc.ymlを設定すればよいだけ。
こんな感じ。
1 2 3 4 5 6 7 8 9 10 11 12 13 14 15 16 17 18 19 20 | |
とりあえずはこのブログだけの設定。
設定すると、後は.github/workflowsに設置されているGitHub Actionsが定期的に動いて サイトの状態をチェックして、api、graphs、historyの各フォルダに 情報を書き込んで行くようになります。
結果はGitHub Pagesで見ることができます。
上で設定しているように https://rcmdnk.github.io/upptimeという感じのURLで見れます。
実際には、このブログをrcmdnk.comという独自ドメインをメインのrcmdnk.github.ioのレポジトリでCNAMEを設定して使って運営していて、 プロジェクトページ側であるupptimeも https://rcmdnk.com/upptimeで見れるようになります。


ブログに表示
まあこんな情報は自分でたまに見る程度でも良いんですが、 せっかくなのでOctopress(Jekyll)のプラグイン作ってブログに表示させてみました。
作ったプラグインはこれ。
- plugins/upptime.rbをプラグインフォルダに入れ
- source/_includes/custom/asides/upptime.htmlにあるような内容を適当に表示させたいところに書き
- 例にあるような_config.ymlの設定を加えてあげます。
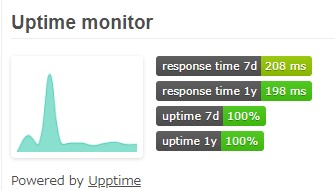
ここではサイドバーのパネルの1つとして以下の様な表示をさせています。